


Counterweight Bridge Lancher Machine
The "counterweight" is the key feature that makes this method possible for long spans. It balances the large cantilever forces created when the machine places a new segment far ahead of the bridge pier.

Specification
Technical Specification for Counterweight Bridge Launching Machine
Document Version: 1.0
Date: October 26, 2023
1.0 Introduction & Purpose
A Counterweight Bridge Launching Machine (CBLM), also known as a Launching Nose or Launching Gantry, is a specialized engineering system used for the incremental launching of bridge superstructures (decks/girders). This method involves constructing successive segments of the bridge in a stationary area behind the abutment and then "launching" them horizontally across the span.
The primary purpose of the counterweight system is to minimize the cantilever moments in the superstructure during the launch process, thereby reducing required material strength and allowing for longer span capabilities.
2.0 System Overview
The CBLM system typically consists of the following key components:
Launching Nose: A lightweight steel truss or frame attached to the front of the first bridge segment.
Counterweight Unit: A configurable system located at the rear of the bridge, providing the necessary downward force.
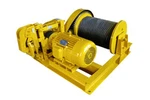
Launching Jacks / Hydraulic Push-Pull System: The primary propulsion mechanism.
Sliding Bearings / PTFE Pads: Low-friction surfaces on which the bridge slides.
Temporary Supports / Piers: Intermediate supports equipped with guiding devices.
Central Control System: For synchronized and automated operation.
3.0 Detailed Technical Specifications
3.1 General Performance Parameters
Maximum Launching Capacity (Bridge Deck Weight): 500 to 12,000 Metric Tons (Customizable per project)
Maximum Launching Length: 50 to 500 meters (Customizable per project)
Typical Launching Cycle Speed: 5 to 20 meters per hour
Maximum Incline/Gradient for Launching: ±5%
Minimum Horizontal Curve Radius: 500 meters (can be designed for tighter radii)
3.2 Counterweight System
Type: Modular, adjustable concrete blocks or hydraulic-controlled ballast system.
Counterweight Capacity: Adjustable from 20% to 60% of the total launched bridge weight, depending on the stage of launch and engineering design.
Control: The counterweight effect can be dynamically adjusted by adding/removing modules or via controlled hydraulic pressure to maintain optimal balance and bending moments.
3.3 Launching Nose
Structure: High-strength steel truss or box girder design.
Length: Typically 55% to 65% of the main bridge span being launched.
Connection: Pin-connected to the front of the bridge deck for easy detachment after launch.
Weight: Designed to be as lightweight as possible while maintaining rigidity, often 10-15% of a typical bridge segment weight.
3.4 Propulsion System
Type: Computer-controlled, synchronized hydraulic jacking system.
Operation Principle: "Push-Pull" or "Incremental Launch" using cyclic gripping and pushing.
Number of Jacking Stations: 1 primary station at the launch abutment, with possible secondary stations for very long bridges.
Total Thrust Force: 2,000 kN to 20,000 kN (Customizable).
Stroke per Cycle: 200 mm to 1000 mm.
Hydraulic Pressure: 350 Bar (standard), up to 700 Bar (high-pressure systems).
3.5 Guiding and Sliding System
Sliding Bearings: Stainless steel plates with Polytetrafluoroethylene (PTFE) pads. Coefficient of friction: ~1-2%.
Lateral Guide Rollers: Adjustable vertical rollers mounted on temporary piers to control lateral alignment (±10 mm tolerance).
Vertical Alignment Jacks: Hydraulic jacks on temporary supports for fine-tuning deck elevation during launch.
3.6 Control and Monitoring System
Control Type: Fully automated, programmable logic controller (PLC) with manual override.
Synchronization: All hydraulic jacks are synchronized to within ±2 mm of stroke.
Monitoring Parameters:
Real-time hydraulic pressure and thrust force.
Stroke length and advancement per cycle.
Deck alignment (laser guidance or GPS).
Stress and strain in critical members of the launching nose and bridge deck.
Counterweight load.
Safety Interlocks: Automatic shutdown in case of overload, misalignment, or system failure.
3.7 Structural Steel Components
Design Codes: Compliant with AISC, EN 1993, or equivalent.
Steel Grade: High-strength, low-alloy steel (e.g., S355, S460, A572 Gr. 50).
Factor of Safety: Minimum of 2.0 for yield strength and 3.0 for ultimate strength under maximum design load.
3.8 Power Supply
Primary Power: 380V / 50Hz / 3-Phase or 480V / 60Hz / 3-Phase.
Total Installed Power: 150 kVA to 500 kVA (depending on system size).
Backup: Diesel generator backup for critical operations.
4.0 Design Loads & Considerations
Dead Load: Self-weight of the machine and the bridge deck.
Live Load: Construction loads, impact during launching.
Wind Load: Designed to withstand wind speeds up to 65 km/h during operation and 120 km/h in stowed condition.
Dynamic Loads: Accounted for during start/stop of launching cycles.
Seismic Loads: As per project-specific site requirements.
5.0 Safety Features
Emergency Stop buttons at multiple locations.
Redundant load-holding valves on all critical hydraulic cylinders.
Over-pressure relief valves in the hydraulic system.
Anti-slip platforms, guardrails, and access ladders.
Automatic brake system in case of power failure.
6.0 Installation, Operation, and Dismantling
Installation: Erection to be carried out by specialized crew using mobile cranes. Typical duration: 2-4 weeks.
Operation: Requires a team of 5-8 trained personnel (supervisor, operator, mechanics, electricians).
Dismantling: Methodical reverse of erection process. All major components are designed for easy disassembly and transport.
7.0 Project-Specific Customization
This specification is a general guideline. The final design of the Counterweight Bridge Launching Machine will be customized based on:
Bridge geometry (span lengths, curvature, gradient).
Superstructure type (Precast Segmental, Cast-in-Place, Steel Box Girder, etc.).
Total launching weight and length.
Site constraints and access.
Key Design Parameters & Performance Specifications
| Parameter | Specification |
|---|---|
| Lifting Capacity (per girder) | 120 Metric Tons |
| Maximum Span (Pier to Pier) | 50 meters (Typical), customizable up to 60m |
| Minimum Curve Radius | 2,000 meters (can be designed for tighter radii) |
| Maximum Supported Grade | ±4% |
| Lifting Hoists | 2 x Main Hoists (typically 120-ton capacity each) |
| Hoist Lifting Speed | 0-5 m/min (variable speed control) |
| Trolley Traversing Speed | 0-10 m/min (variable speed control) |
| Main Beam Launching Speed | 0-5 m/min (variable speed control) |
| Machine Self-Propelling Speed | 0-5 m/min (variable speed control) |
| Control System | Centralized PLC with frequency control for all motions. Remote control operation. |
| Power Supply | 380V / 50Hz / 3 Phase (or as per project requirement) |

Pictures & Components
1. Launching Nose
The nose is a temporary, lightweight steel truss or frame attached to the front of the first bridge segment.
Function: To reduce the cantilever moments (bending forces) that occur as the bridge deck extends from one pier to the next. Without it, the front of the bridge would sag or break.
Key Features:
Lightweight Steel Structure: Designed to be as light as possible while providing the necessary stiffness.
Variable Length & Stiffness: The length is typically 60-70% of the main span. Its stiffness can sometimes be adjusted.
Connection to Bridge Deck: It is securely bolted or pinned to the leading segment of the bridge.
2. Temporary Supports / Piers
These are the structures that guide and support the bridge as it is launched.
Intermediate Temporary Piers (or Props): Used when the span between permanent piers is too long. They are temporary steel or concrete towers that prevent excessive deflection.
Launching Girder / Nose Support Truss: In some systems, a massive supporting truss extends from the abutment, carrying the weight of the bridge and the launching equipment itself. This is common for very long or heavy launches.
Guide Structures: Temporary bracing or rollers on top of the piers to ensure the bridge deck stays aligned laterally during the launch.
3. Launching Jacks / Drive System (The "Machine" Heart)
This is the core mechanical system that provides the thrust to move the massive bridge structure.
Function: To incrementally push or pull the bridge deck forward with precise control.
Key Components:
Hydraulic Jacks (Cyclic Launching): The most common system. It uses a "two-steps-forward, one-step-back" cycle:
Lifting Jacks (or Vertical Jacks): Lift the bridge deck slightly off the bearings.
Launching Jacks (or Horizontal/Pushing Jacks): Push the entire deck forward one stroke (e.g., 500-1000 mm).
Lifting Jacks Retract: The deck is lowered back onto the bearings.
Launching Jacks Retract: The jacks return to their starting position to grip the deck for the next push.
Climbing Jacks / Self-Locking Jacks (Continuous Motion): A more modern system that uses a "walking" mechanism.
These jacks have two sets of jaws (wedges or clamps): one fixed, one sliding.
They grip the specially designed Launching Rods or a strong steel strand.
By alternating the grip and stroke of the sliding and fixed jaws, they create a smooth, continuous pulling motion.
Launching Rods / Strands: High-strength steel bars or cables that run through the jacks. The jacks grip these rods to pull the bridge forward. They are anchored at the front of the bridge or within the deck.
Central Control Unit & Hydraulic Power Pack: The brain and muscle of the operation. It synchronizes all jacks to ensure a perfectly level and controlled launch, preventing any twisting or jamming.
4. Bearings and Sliding Surfaces
These components manage the immense friction and transfer loads between the moving bridge and the stationary supports.
Temporary Sliding Bearings:
PTFE (Teflon) Pads: These are slid against Stainless Steel (SS) Plates. PTFE has an extremely low coefficient of friction, making sliding possible.
Elastomeric Pads with PTFE: Combines the load distribution of rubber with the low friction of PTFE.
Permanent Bearings: Once the bridge is in its final position, the temporary sliding bearings are replaced or reconfigured into the permanent bearing system (e.g., pot bearings, spherical bearings) that allow for thermal expansion and contraction.

Sketch


Advantages
1. Technical and Engineering Advantages
Enables Construction in Inaccessible Terrain: This is its single greatest advantage. It can build bridges over deep valleys, wide rivers, busy highways, active railway lines, and environmentally sensitive areas without the need for ground-based scaffolding or falsework. This eliminates massive disruption and the high risk associated with building temporary supports in these locations.
Superior for Long Spans and High Elevations: The machine is specifically designed for launching large, heavy pre-cast segments over long distances and at great heights, where conventional cranes or methods would be impractical, unsafe, or prohibitively expensive.
Controlled and Precise Launching Process: The entire operation is highly mechanized and controlled. Hydraulic jacks provide smooth, incremental movement, allowing for precise alignment of the bridge segments. The counterweight system ensures stability throughout the process.
Handles Complex Geometries: Advanced versions of these machines can construct bridges with horizontal curves (curved alignments) and significant gradients, providing flexibility in bridge design to meet the demands of the terrain.
2. Economic and Project Management Advantages
Increased Construction Speed: Once the machine is set up and the segment prefabrication yard is running, the launching process is very rapid compared to traditional in-situ methods. This leads to a significantly shorter overall project timeline.
Cost-Effectiveness for Repetitive Spans: On projects with multiple spans of similar length and design (e.g., viaducts for highways or railways), the method becomes highly economical. The repetitive nature of the process allows for optimized labor, equipment use, and material procurement.
Reduced Labor Costs: The process is heavily mechanized and requires a smaller crew on-site compared to extensive formwork and casting operations. Labor is focused on segment fabrication, machine operation, and precision checks.
3. Safety and Environmental Advantages
Enhanced Safety: By minimizing or eliminating work over open heights and deep drops, and by reducing the need for workers to be underneath temporary structures, the overall safety risk is greatly reduced. The work platform is primarily on the already-constructed deck and the launching machine itself.
Minimal Environmental Impact: Since there is no need for extensive ground clearing, access roads, or large foundations for falsework in the area below the bridge, the environmental footprint is significantly smaller. This is crucial in ecologically sensitive areas like wetlands, forests, or wildlife corridors.
Minimal Disruption to Existing Infrastructure: Construction over active roads, railways, or waterways can proceed with little to no interruption to the traffic below. This is a massive benefit for urban and industrial areas, avoiding costly detours and traffic management.
4. Quality and Structural Advantages
High-Quality, Factory-Made Segments: The bridge segments are typically pre-cast in a controlled yard environment. This allows for much stricter quality control of the concrete, rebar placement, and curing conditions than is often possible with cast-in-place concrete high above the ground.
Efficient Use of Materials: The method often uses pre-stressed concrete segments, which are highly efficient in their use of materials, leading to a lighter yet stronger deck structure.

Application
Ideal Applications and Examples
This method is chosen for specific challenging scenarios:
Valleys and Gorges: Where the ground is inaccessible or too deep for falsework (e.g., bridges in mountainous regions).
Water Crossings: Over wide rivers, shipping lanes, or estuaries where building temporary supports from the bed is expensive or disruptive to navigation.
Existing Infrastructure: When building a bridge over a highway or railway without interrupting traffic below.
High Bridges: Where the height makes conventional scaffolding impractical and dangerous.
Famous examples of bridges built using this principle include:
Rio–Niterói Bridge (Brazil): One of the most famous applications.
Skyway Bridge (Florida, USA): Its precast segments were erected using a similar balanced cantilever method.
Many modern viaducts for highways in Europe and Asia.

Production Procedure
Production Procedure for Counterweight Bridge Launching Machine (BLM)
Document Control:
Procedure ID: PP-BLM-001
Revision: 1.0
Date: [Date of Issue]
1.0 Purpose and Scope
1.1 Purpose:
To define the systematic procedure for the manufacturing, assembly, testing, and preparation for shipment of a Counterweight Bridge Launching Machine. This ensures the final product meets all design specifications, quality standards, and safety requirements for the launching of precast bridge segments.
1.2 Scope:
This procedure covers all activities from the receipt of raw materials to the final dispatch of the BLM. It includes:
Material Management
Steel Fabrication
Machining of Critical Components
Sub-assembly and General Assembly
Installation of Mechanical and Hydraulic Systems
Electrical and Control System Integration
Factory Acceptance Testing (FAT)
Surface Treatment and Painting
Dismantling, Packaging, and Shipping
2.0 Key Components of a Counterweight BLM
Understanding the final product is crucial for the production process. The main subsystems are:
Main Truss/Girder: The primary load-bearing structure that spans the gap and supports the segments.
Front Support (Nose): The cantilevered section at the front of the truss.
Rear Support & Counterweight Frame: The structure at the rear that holds the counterweight blocks.
Launching Gantry/Trolley: The moving unit that transports segments along the top of the truss.
Hydraulic System: Provides power for lifting, launching, and adjusting the machine (cylinders, pumps, valves, hoses).
Electrical & Control System: Includes motors, sensors, PLCs, and the operator's cabin for precise control.
Supporting Systems: Walkways, ladders, safety rails, and lighting.
3.0 Detailed Production Procedure
Phase 1: Engineering and Planning
Design Finalization: Detailed engineering drawings, Bill of Materials (BOM), and hydraulic/electrical schematics are finalized and approved.
Procurement Planning: All required materials (steel plates, sections, bearings, hydraulic components, electrical components) are identified and procurement is initiated.
Process Planning: Manufacturing sequence, welding procedures, and quality inspection plans are established.
Phase 2: Material Procurement and Inspection
Material Receipt: Raw materials (structural steel, plates, etc.) are received and logged.
Incoming Inspection: Materials are inspected for grade, dimensions, and surface defects against mill certificates and purchase orders. Non-conforming materials are quarantined.
Phase 3: Steel Fabrication
Marking and Cutting:
Steel plates and sections are marked according to nesting drawings to optimize material usage.
Cutting is performed using CNC plasma/oxy-fuel cutters or saws for high precision.
Forming and Bending:
Plates requiring curvature (e.g., for gussets, custom brackets) are formed using press brakes or rolling machines.
Welding and Sub-Assembly:
Components are fit-up using jigs and fixtures to ensure dimensional accuracy.
Welding is performed by certified welders using approved procedures (SMAW, GMAW, SAW). Key welds are 100% visually inspected.
Sub-assemblies like truss chords, diagonals, and gantry frames are created.
Stress Relieving (if required):
For critical, thick-walled components, post-weld heat treatment (PWHT) may be applied to relieve residual stresses.
Phase 4: Machining of Critical Components
Components: Pivot pins, bearing seats, and connection interfaces on the main truss and gantry.
Process: Machining is done on CNC lathes and milling machines to achieve tight tolerances and fine surface finishes as per design.
Phase 5: General Assembly (in Factory)
Assembly Area Setup: A clean, level, and spacious assembly area is prepared.
Truss Assembly: Sub-assembled truss sections are aligned and bolted/welded together to form the full-length main truss. Alignment is critically checked with laser levels and theodolites.
Support Structure Assembly: The front nose and rear counterweight frame are assembled and connected to the main truss.
Mechanical System Installation:
The launching gantry/trolley is assembled, and its wheels/tracks are installed.
Lifting beams and winches are mounted onto the gantry.
Hydraulic System Installation:
Hydraulic cylinders (for lifting, launching, and balancing) are installed.
Hydraulic power unit (HPU), valves, manifolds, and piping/hosing are installed. The system is filled with the specified hydraulic fluid.
Phase 6: Electrical and Control System Integration
Cabinet Installation: Control panels, PLC cabinets, and variable frequency drives (VFDs) are mounted.
Wiring: All sensors (limit switches, LVDTs, pressure transducers), motors, and actuators are wired back to the control cabinets according to schematics.
Operator Cabin: The cabin is installed and all control interfaces (joysticks, HMI touchscreen, emergency stops) are connected and tested.
Phase 7: Factory Acceptance Testing (FAT)
This is a critical phase to verify performance before disassembly for shipping.
Visual and Dimensional Inspection: Confirm all components are installed correctly and dimensions match the as-built drawings.
Hydraulic System Test:
Check for leaks at all connections.
Test all cylinders for full extension/retraction.
Verify system pressure settings and relief valve functionality.
Functional Test (No Load):
Operate the launching gantry: traverse it the full length of the truss.
Test all winches and lifting mechanisms.
Test all safety limit switches and emergency stop circuits.
Load Test (Simulated):
Apply a simulated load (typically 125% of the rated working load) to the lifting system using calibrated load cells or test weights.
Measure deflections of the main truss and compare them with theoretical values.
Control System Test:
Verify all functions from the operator's cabin.
Test interlocks and safety protocols (e.g., gantry cannot move if a load is unsupported).
Phase 8: Surface Treatment and Painting
Surface Preparation: After FAT, the entire structure is cleaned of rust, mill scale, and contaminants using abrasive blasting (e.g., shot blasting) to the specified standard (e.g., Sa 2.5).
Painting: A multi-layer paint system (primer, intermediate coat, topcoat) is applied as per the technical specification, ensuring adequate dry film thickness (DFT).
Phase 9: Dismantling, Marking, and Packaging
Systematic Dismantling: The BLM is carefully dismantled in the reverse order of site erection. The sequence is planned to minimize site reassembly time.
Component Marking: Every part is marked with a unique tag number corresponding to the general arrangement and erection drawings.
Packaging:
Hydraulic components and electrical panels are sealed against moisture and dust.
Machined surfaces and threads are greased and protected.
Structural members are bundled and secured for sea-worthy/road-worthy transport.
Phase 10: Documentation and Dispatch
Final Documentation: A complete dossier is prepared, including:
As-built drawings
Welding certificates
Material certificates
Hydraulic circuit diagrams
Electrical schematics and PLC programs
FAT Report
Operation and Maintenance Manuals
Dispatch: The packaged components are loaded onto trucks or shipping containers and dispatched to the project site.
4.0 Quality Control and Safety
Quality Control: Inspection and test plans (ITP) will be followed at every stage. All inspections will be documented.
Safety: All fabrication and assembly activities will adhere to strict workshop safety protocols, including permits for hot work, use of PPE, and LOTO (Lockout-Tagout) procedures during electrical and hydraulic testing.
5.0 Conclusion
This procedure ensures that the Counterweight Bridge Launching Machine is produced to the highest standards of quality, safety, and performance, providing a reliable and efficient solution for bridge construction projects.


Workshop View
The company has installed an intelligent equipment management platform, and has installed 310 sets (sets) of handling and welding robots. After the completion of the plan, there will be more than 500 sets (sets), and the equipment networking rate will reach 95%. 32 welding lines have been put into use, 50 are planned to be installed, and the automation rate of the entire product line has reached 85%.


Hot Tags: counterweight bridge lancher machine, China counterweight bridge lancher machine manufacturers, suppliers, factory
You Might Also Like


Send Inquiry